Friday, 8 May 2015

Darth gets his choke on


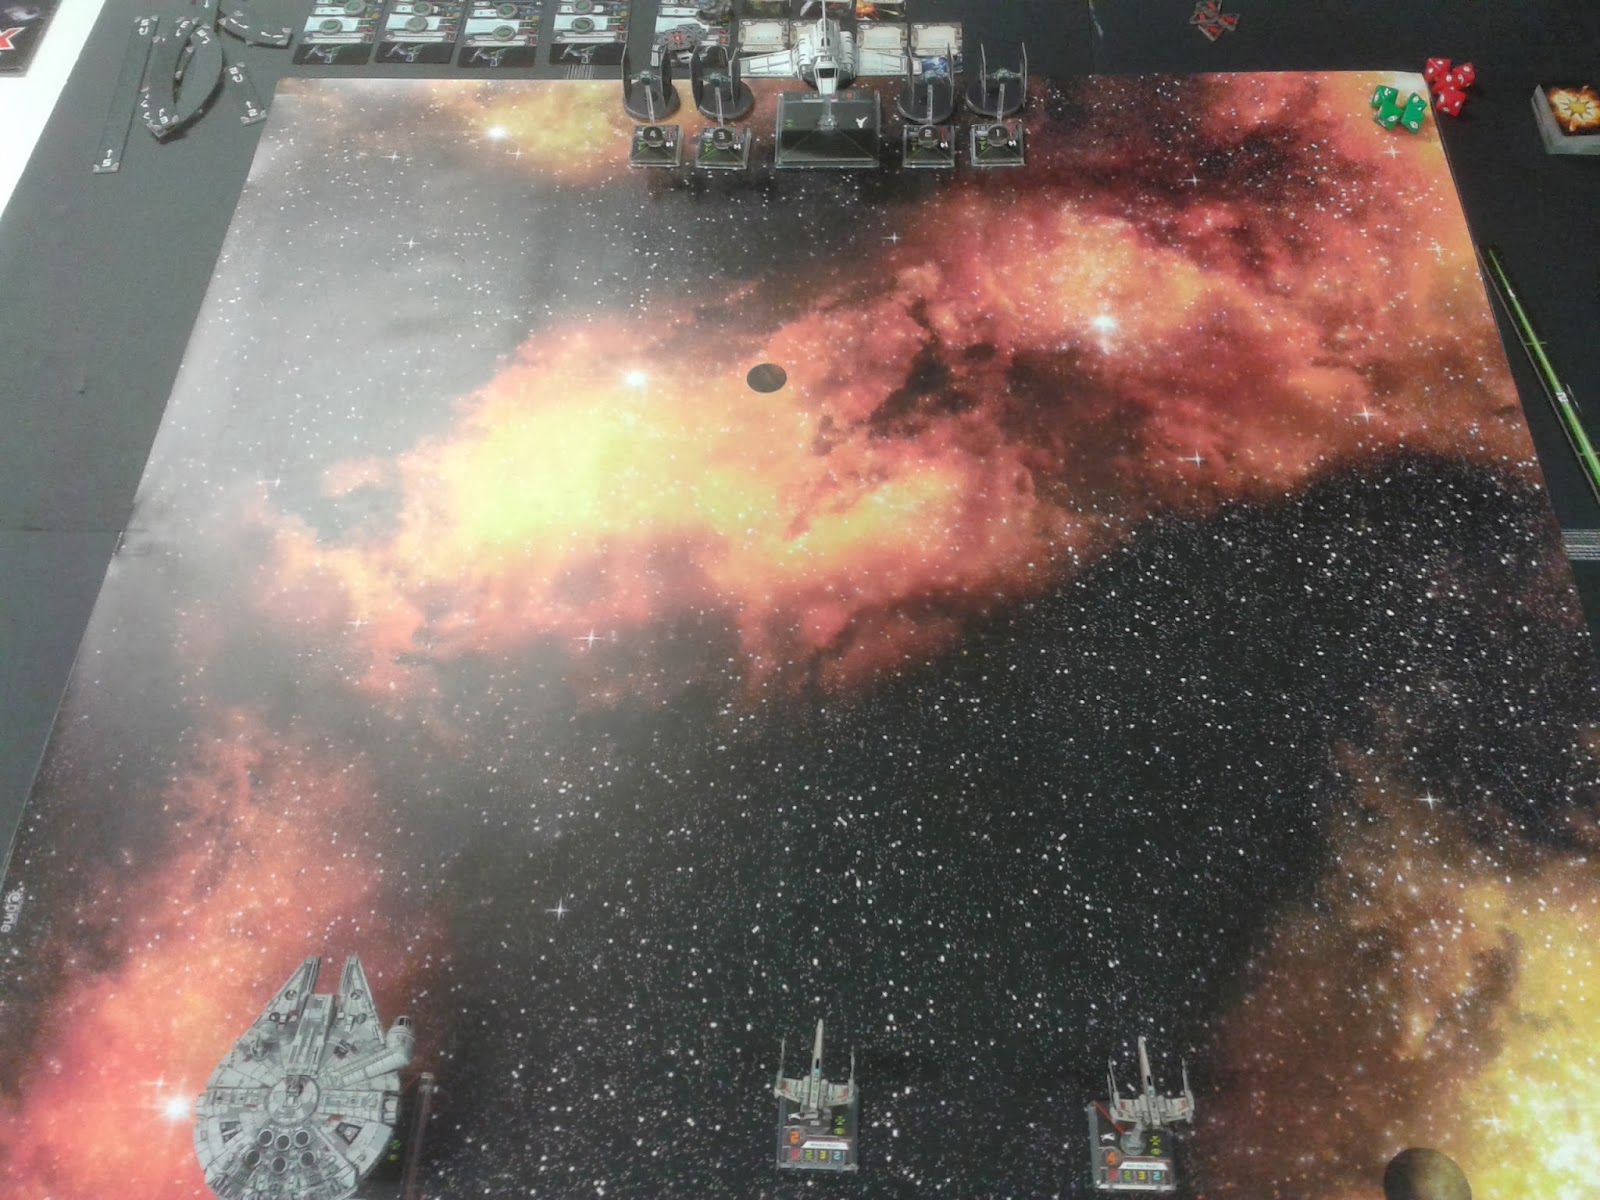
I've succumbed to the meta, and ordered a pair of ships that have had some success if forums are to be believed:

DECI-MATES
99 points

PILOTS
Commander Kenkirk (56)
VT-49 Decimator (44), Ysanne Isard (4), Gunner (5), Rebel Captive (3)

Patrol Leader (43)
VT-49 Decimator (40), Darth Vader (3)


Game 1

First up was Phil with a Scum list that I've tried to duplicate from memory and looked a lot like this:


PHILS LIST 1?
96 points

PILOTS
Kavil (30)
Y-Wing (24), Autoblaster Turret (2), Unhinged Astromech (1), Push the Limit (3)

Binayre Pirate (14)
Z-95 Headhunter (12), Dead Man's Switch (2)

Tansarii Point Veteran (29)
M3-A “Scyk” Interceptor (17), Push the Limit (3), “Heavy Scyk” Interceptor (2), Heavy Laser Cannon (7)

Syndicate Thug (23)
Y-Wing (18), Ion Cannon Turret (5), BTL-A4 Y-Wing (0)

Setup and Phil's fleet deploys opposite two small moons...


First turn, and the fleets nervously edge towards each other, Kaval swinging left to join the rest.


The Patrol leader breaks to port to engage Kaval while Commander Kenkirk banks to starboard away from the kamikaze Z-95. Kaval pushes the limit preparing to pound his target. 


Meanwhile in the middle disaster strikes with the Y-Wing slamming into the back of the banking Z-95 and loses his action. The Scyk barrel rolls right and targets Kenkirk, earning him a stress token - thanks Rebel Captive!


The Decimators bank towards each other, turret guns hurling death at the Scummy Villains. Kaval and the Y-wing tag each other and switch targets. The Binayre Pilot in his flying bomb tracks Kenkirk enjoying a complete lack of return fire. The Decimators have taken damage but this gives Kenkirk an evade dice and a free evade action. Disaster strikes as the Scyk takes critical hits disabling his Heavy Laser Cannon and reducing his Pilot Skill to 0. (We both agreed afterwards this was the determining factor for the outcome.). He is reduced to moving 1 ahead to clear the accumulated stresses of targeting Kenkirk's ship.


Kaval, his shields down and ship damaged, takes enfilade fire from both Decimators and is blown to pieces. The annoying Binayre keeps chipping away while the Scyk carries on reducing his stress. The remaining Y-Wing hammers in firing both primary and secondary weapons. Unfortunately a single ion cannon token does nothing to Decimators. 


The Scyk is well on his way to pulling a Maverick, as this stolen footage taken from the Scum Battle Control Systems shows:


Despite having 9 square feet of playing space another traffic jam develops, even the M25 would be impressed by this.


The Scyk banks slowly as his allies scream at him to get back in the fight


With inspirational 80's battle music in his ears, the Scyk goes head-to-head with the Russian Mig Patrol Leader's Decimator, forcing it to fire on the Binayre instead.


Meanwhile the Binayre manages to cause his patented "crash for cash" scam on Commander Kenkirk, forcing him to target the Scyk.


Kenkirk hits the Scyk and blows it to pieces. The Patrol leader hits the Binayre, taking it to one remaining hull point. Vader strongly considers force choking the Scyk into the hereafter, but doing so will destroy the ship he's on as it only has two hull points left. The resulting explosion from the Dead Man's Trigger would harm Kenkirk too.

Disaster for the Empire as the Binayre lines up the Patrol Leader and shoots him down.


Kenkirk lines his guns up and shoots the Binayre down, victory for the Empire!


Game 2

Phil agreed to a second game, and his revised Scum force looked like this:


Ha! No really, it went something like this:


PHIL'S LIST 2?
98 points

PILOTS
IG88-B (51)
Aggressor (36), Veteran Instincts (1), Sensor Jammer (4), “Mangler” Cannon (4), “Hot Shot” Blaster (3), IG-2000 (0), Stealth Device (3)
IG88-D (47)
Aggressor (36), Veteran Instincts (1), “Mangler” Cannon (4), “Hot Shot” Blaster (3), IG-2000 (0), Stealth Device (3)

Deployment and four large ships hit the table from opposing corners. They edge towards each other even more nervously than before.


The IG-88's are extremely manoeuvrable, running rings around the lumbering Decimators. Disaster strikes again as Phil mistakenly chooses a red action for a stressed ship and I get to choose the movement instead, which is why the one bottom left is bugging out.


One of the 88's loops around gently avoiding the table edge while his compatriot harries Kenkirk but builds up stress from shooting at a Rebel Captive.


Looping around the Patrol Leader manages to knock an 88 down to one hull, and Vader gives his ship two damage to finish the 88 off. One down one to go!


The remaining 88 lands up in a crossfire, reduced to one hull too and Vader makes it two for two!


While Vader isn't always a wise choice (particularly if the enemy has shields) in this case he certainly was worth his 3 points and earned some light approval.


Friday, 20 March 2015

Battle report 19 March 2015

Jumbo's Lead The Way


So after a break of far too many years I dusted off my Flames of War hat and took on Allan's well blooded panzergrenadier company.

The Forces


  • German
    • 3 x PanzerGrenadier platoons
    • 1 x Engineer platoon
    • 2 x 88mm guns
    • 3 x Tiger tanks
    • 2 x Quad AA halftracks
    • 1 x Battery of 4 x 105mm howitzers

  • US
    • 2 x M4A3 Shermans 76mm (HQ)
    • 2 x platoons each of
      • 1 x Sherman Jumbo
      • 2 x M4A3 Sherman 76mm
      • 2 x M4A3 Sherman
    • Priority air support with close support upgrade

The Battlefield


The battlefield was fairly open, the Germans enjoying some good broken ground while I had a couple of hills to hide behind. We deployed as below:


The Battle

Taking turn one, I sent both platoons surging 6" across the hill to make use of stabilizers but also get within the crucial 16" range. I knew those 88's and Tigers would have to be taken out if I stood any chance. I deployed right opposite them as their 40" range meant deploying away from them left me vulnerable to side armour hits. Straddling the hill I let rip with ten main guns and 30 VMG shots.


Despite being concealed and dug in, this was just enough to knock both 88mm guns out. So far so good, but three excellent Tiger tanks remained. Two P-47's came screaming in but were driven off by the AA trucks.

The Tigers returned fire, but their two hits were both allocated to the Jumbos and their front armour over 16" range meant no harm could come to the platoons. The 105mm artillery joined in, ranging in on the first attempt and knocking out an M4A3 and a Jumbo! That AT rating of 4 is far better than I remember. Meanwhile Panzergrenadier platoon 3 quietly made its way through the town towards my objective.

I sent both platoons forward and left to engage the tigers, while my HQ tanks moved right to squirt the advancing infantry. The Tigers and Shermans duelled for a few turns as the Jumbo deflected hits and eventually the 76mm Shermans knocked two of them out, the third Tiger breaking off and racing for Berlin. Meanwhile my HQ tanks were not making much headway against the excellent 3+ infantry save. The blinking artillery claimed another two Shermans.

Fearing I was going to claim the objective with the Tigers gone, Allan raced platoon 2 towards the objective alongside platoon 3. Platoon 2 moved at the double, and my HQ tanks emerged from the hills and couldn't resist lighting them up. Them moving at the double granted me 20 VMG shots which was enough to break the platoon and send them running. Platoon 3 was broken next as the HQ tanks turned their VMG's on them.

Last turn and the game still a draw, I sent Platoon 1 with it's four remaining tanks into Platoon 1. The panzerfausts missed and my tanks killed two bases. The Panzergrenadiers rallied and charged in, their panzerfausts hitting the mark and killing two Shermans. My platoon broke and ran for the hills.

The game ended in a draw, which was a fair result as it swung either way each turn. The 105mm guns were a huge problem for me. Having only 12 tanks I found didn't leave me enough to press an advantage once I'd made the gap. Having used the old Market Garden lists before, I found the upgrades in Blood, Guts and Glory make a massive difference to the ability of a Sherman company, the Jumbo's are incredibly useful and the 76mm mean Tigers have a real reason to stay hidden.

Great game, I look forward to more Flames of War goodness. 

Thursday, 15 January 2015

Games night 15 January 2015


  • Flames of War
    • Jack & Allan vs Phil & Alan
    • Rob vs Mark
  •  Art de la Guerre
    • Jon vs Andy vs Bruce
  • Saga Cross and Crescent
    • Rob vs John
  • X-Wing
    • Roger vs Neil

Monday, 22 September 2014

Games night 25 September 2014

Players available and looking for games so far
  • Bruce - Saga
  • Chris - Saga
  • Rory - Saga
  • Neil - Saga 
  • Bill - Saga
  • Taofiq - Saga (needs an army)

Friday, 31 January 2014

Bounty hunters. We don't need that scum.


This week I was up against Rob, and I was itching to try the "Preystalker" mission that came with the Firespray-31 / Slave 1 model. Giving Rob the option of choosing a faction, his decision revolved entirely along me having no A-Wings in my collection and he went with Imperials. He had 90 points to use, selecting the following:

  • Bounty hunter in a Firespay-31
  • Mauler Mithel (Tie Fighter)
  • Dark Curse (Tie Fighter)
  • 2 x Academy pilots (Tie Fighter)
I had to choose one of my pilots  to be the bounty. His base cost doubles, but he gains an additional elite pilot talent and an additional up to 10 points discount to all of his upgrades. I had 150 points to play with, not easy with my paltry collection of a Millenium Falcon, two Y-Wings and three X-Wings. I wanted to be competitive and so ignored the Y-Wings. My eventual list was:
  • Luke Skywalker as the bounty, in an X-Wing with Marksmanship, Determination and R2-D2.
  • Han Solo in the Millenium Falcon with Draw Their Fire
  • Two Rookie Pilots in X-Wings (possibly with droid upgrades, I forget)
(apologies for the awful lighting, the Imperials were jamming our signal)Deployment saw Han and Luke in the middle, with a Rookie Pilot covering on each wing. Rob deployed heavily to port.

Turn one saw everyone light up their afterburners. Han ploughed ahead while Luke broke left seeking the relatively Imperial-free left side of the mat. The right Rookie raced ahead to engage the entire Imperial squadron on his own, while the left Rookie turned toward the rest of the game. 80% of the Imperials raced toward the Rookie opposite them, blasting him to pieces, while Dark Curse sped towards the Millenium Falcon and Luke.


The Falcon broke right to engage the Imperials while Luke and the remaining Rookie both locked on to Dark Curse but battled to anticipate his moves and bring him into their firing arc. The Imperial Ties banked right, headed for the remaing three Rebel ships, while the bounty hunter broke left, anticipating Han not remembering that they have aft-facing weapons too...


Disaster strikes! The Falcon, having weathered a lot of hits, finally succumbs to Imperial fire and is blown to bits. Only having one evade die has really hamstrung Han's wagon. Two remaining X-Wings have the huge task of destroying the five Imperial ships.


Forming up in line abreast, the X-Wings surge towards the bounty hunter and his Mauler Tie escort, pursued by an Academy pilot and Dark Curse who's still lit up by their target locks like a Christmas tree. The X-Wings blow an Academy pilot out of the sky.


But the pursuing Tie's and the bounty hunter's sneaky rear weapons gun down the remaining Rookie, and Luke is on his own!

At this point I'd like to remind readers that the Imperial objective has always been to kill the bounty, ie Luke. Keen-eyed followers will note that Rob has killed everything except the bounty. His defence was the Falcon was just too vulnerable to pass up. I'm just saying.


Luke lights up his engines, the bounty is in hot pursuit of the bounty hunter, both straying dangerously close to the table edge and the ignoble death that awaits should they cross it. There are some long shots from the remaining Tie's but Luke's ability to always change one focus defence die into an evade buys him  a lot of time. Luke keeps hammering away at the bounty hunter's shields and inflicts some damage.


Air traffic control rears its ugly head and disaster strikes, again. For the Imperials this time, as the bounty hunter misjudges his turning circle and departs from the table counting as destroyed. He also earns six points on his licence and is banned from flying for three months. Luke celebrates until he realises his pursuit has brought him dangerously close to the same edge-shaped death and he's in a ride with no reverse gear.


Slamming the engine down into granny gear he begins the slow process of sharp turns back to the playing area, while a gaggle of Tie's descend upon him.


After several agonising game turns involving slow turns Luke races off with the Ties in hot pursuit, green pew-pew death chasing him all the way.

 Sneakily flinging his ship around 180 degrees, Luke hammers into the Ties with guns blazing, causing damage but no losses. He is finally able to make use of the target lock he got on Dark Curse in turn 1!


Though he's able to evade the firing arcs of two of the fighters, one Tie pilot scores an amazing string of hits and Luke is blown to bits. Victory for the Imperials!


I'm not quite sure why I'm having no luck with what is supposed to be a very easy list, Han Solo and some X-Wings. Luke lasted much longer than I expected, and I put that down to his ability to always turn a focus defence die into an evade. I'm trying not to think about how my +-120 points of Rebels were so bested by 90 points of Imperials...

Friday, 24 January 2014

What good is a reward if you ain't around to use it?


This week Darth Phil felt inclined to give his Imperial fleet another run, giving me a chance to try the "Han shoots first" list I read about online. Apparently it is foolproof... apparently.


The Millenium Falcon crewed by Han and Luke is accompanied by a rookie X-Wing pilot and Biggs Darklighter. Biggs has an unusual rule, if a friendly ship within range 1 is targeted and the enemy is able to target Biggs instead, they must do so. I took him as a fire magnet to protect the Falcon, and because it's always amusing to taunt those pilots who manage to die before Biggs! Facing the Rebels were two pods of Imperials. on the port side a Tie Interceptor with two Academy pilots in Tie Fighters, and to starboard Marek Steele in his Advanced Tie Fighter also escorted by two Academy pilots in Tie Fighters. Green pew-pew death hurts just as much as red pew-pew, and there sure is going to be a lot more of it.


The Rebel ships advanced at full speed, while to the two Imperial pincers closed but not enough for either to be in weapons range.


Next turn and the fleets collide! Those with a keen eye will find the lack of Biggs in this picture... disturbing.
 With every ship happening to be in range, and all the Imperials forced to target Biggs, he went down in a blazing heap. Marek got a lock on the Falcon, and some Imperial ships were damaged but none lost.


The Falcon ploughs through, it's facing not important as it's turret weapons have an all-round arc of fire. The Rookie pulls hard to starboard to engage the Imperials, themselves either ploughing ahead or pulling a Koiogran turn to turn 180 degrees. The Falcon blasts Marek's shields while the Imperials whittle down the shields of the rookie and the Falcon.


A Tie fighter is knocked out, but still hideously outnumbered and lacking shields the rookie is blown to bits! Han hits the accelerator and the Falcon tries to put distance between itself and the remaining Imperials.


Keeping the Imperials at arm's length, Han manages some impressive rolls to inflict damage to Steele's Advanced Tie Fighter. The Imperials have by now blasted the shields of the Falcon away and the chase is on!


Performing a sneaky Koiogran Turn of its own, the Falcon turns to face the Imperial ships. More damage inflicted to some of the fighters, and more hits on the Falcon keeping Chewbacca busy. Will Han bolt right ahead or break left?


As if reading his mind, the Imperials guessed Han will head straight for them, and there's a collossal collision coming! The Falcon blasts its enemies bravely, but there is just too many of them and the Falcon is blown to pieces in the fusillade - another Imperial victory!


While the Tie Fighter swarm is an air traffic control disaster with many misjudgements causing collisions and costing the Fighters their valuable evade action tokens, it remains very challenging to beat. Taking Biggs was a real mistake, as this forced the Imperials to focus their fire on him and remove him from the game. The Rebels managed to damage quite a few of the Imperials but not focussing fire and destroying them outright meant they remained to return fire and eventually grab the win.

Friday, 17 January 2014

It's an old code sir, but it checks out


A long time ago in a galaxy far, far away, an Imperial shuttle escorted by no less than four academy pilots in Tie fighters was making its way through the Eneftiess system. Known for its piracy (and cheap, flat beer) it was no surprise that they were jumped by smuggler Han Solo and a couple of X-Wing pilots, one from red squadron and the other his padawan rookie pilot.


The Imperial fleet steamed slightly to port, in a formation wrapped tighter than Han Solo in cryptonite. The Millenium Falcon deployed far left and proceeded to lazily circle to starboard like a gunship, using its turret weapons to rain red tainted pew-pew death. The X-Wings rushed up at fully speed, eager to win some medals. As movement orders each turn are all planned in advance and kept secret, it's natural to see some creative air traffic control. Despite there only being seven ships navigating nine square feet of space, a scrum quickly developed in two turns


The rebel pilots had it on good authority there was a significant bounty to be had in the destruction of the Imperial shuttle, rumoured to be carrying an emergency shipment of Kiwi's finest helmet polish for a certain Darth Vader. This led to all their fire being directed at the shuttle, which led to the Tie fighters living much longer than they expected to. While the rebels pounded the shuttle's shields, the Imperials pummelled the rebels' own shields.


The shuttle eventually makes a break through the swirling dogfight and legs it, with the piece of junk that made the Kessel Run in less than twelve parsecs in pursuit. The X-Wings (badly damaged and soon to be ex-wings) put one Tie fighter down, and having read somewhere that the shortest distance between two points is a straight line, head right for the shuttle, pursued by a triplet of Tie fighters.


The Tie Fighters finally take the remaining two X-Wings down, but not before they add some damage to the shuttle. True to his name, Captain Solo sweeps around to engage the shuttle and its escorts all on his own.


Success! The shuttle is finally unable to hold out and collapses in a fiery storm of silence because in space no-one can hear you scream. Or burn. The Tie Fighters have by now pummelled half of the Millenium Falcon into little bits that even Chewbacca couldn't put back together. Han decides to put some space between him and the fighters, hoping to engage them one at a time, and locks in his course....


...leading him off the table. Fail. Counting as being destroyed, it leads to an Imperial victory for some very surprised academy pilots, who needed to look it up in a dictionary.

This game was great fun, rather than the fiery death and endless collisions everywhere that's encountered when using only small ships, the larger ships provide some neat abilities and provide good anchors to the game.